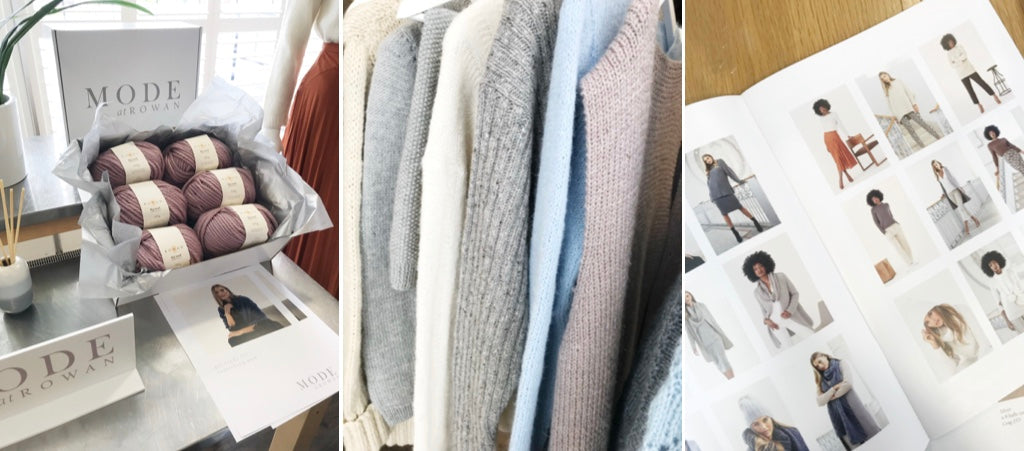
In June 2019, Georgina at Quail Studios reached out to invite me to an exciting Press Event at Peter Jones, in London. Now I love a yarn-based event, and the chance to see my knitting and crochet friends, make new friends, and fan girl over people I follow on Instagram is very appealing to me. So I requested a Plus One (my teeny baby) and on the event day I bundled the baby into her cutest knitted outfit, and off we went!
The event was a launch for Mode at Rowan, from British yarn powerhouse Rowan Yarns. Rowan Yarns was started in 1978, with the vision to produce a paintbox array of high-quality and trend-focused knitting yarns in natural fibres, and these values are still at the heart of the company today. The plan for Mode at Rowan was to design capsule collections with an edited lineup of the Rowan colour palette, with a focus on modern, on-trend designs. There were rails of samples to try on, from super soft, lightweight pieces to gorgeous chunky knits and lots of gorgeous yarn to squish.
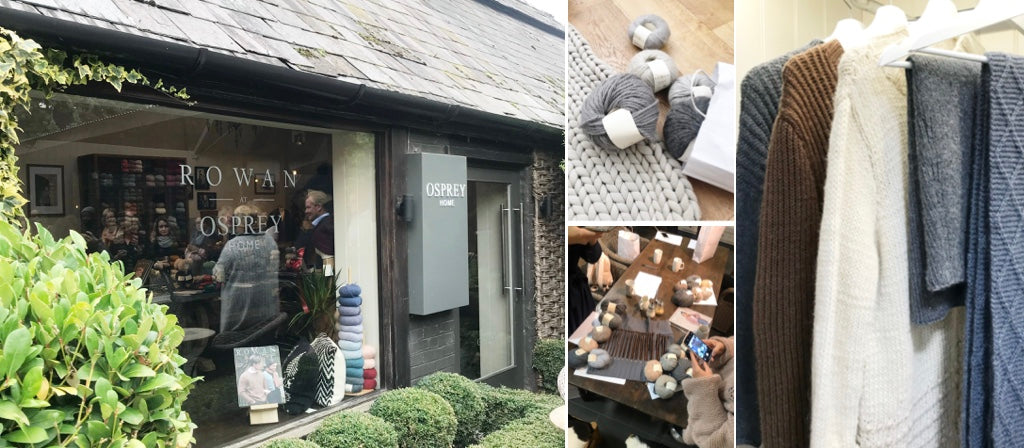
Georgina and I had been trying to meet up to chat for a long time, and after maybe 18 months of attempts, it was great to meet in real life. The Mode at Rowan plans were big, and I was invited to a follow up event a few months later at Osprey House, the flagship for Rowan Yarns. I highly recommend visiting, if you are in the area - the perfect mix of interior decor pieces and wool, stacked to the ceiling, in the beautiful English countryside.
The Mode at Rowan Bloggers
Designing for Rowan is probably one of the most exciting opportunities for any knitwear designer, and I was (and still am) so very proud to even be asked to attend the meeting. If you’re interested in becoming a knitwear or crochet designer, I’ll give you my top tips in a future blog post to help you on your journey!
I went home, with armfuls of yarn samples and oodles of ideas. Most of my designs start out with either Pinterest boards full of inspiration (you can follow me on Pinterest {here} to get some of my yarny inspo!), or I grab the yarn and some needles and just start trying things out. This was a mixture of the two, and after loads of sketches and swatches, I had my pile of concepts to submit. I was so excited to have two designs selected for the collection. Actually, I am still so excited about this!
Now, I wasn’t alone in this journey - my talented Mode at Rowan Blogger’s Edit friends include Samantha from @pippy_eve, Katharina of @katandleni and Lily Kat from @lilykatemakes, and they all have created absolutely beautiful knits. If you don’t follow them, you absolutely should!
Can You Ever Have Too Many Chunky Knits?
THE COCOON
If you’ve been with me for a while, you will know that I love a chunky knit. (If you’re new here, welcome! My name is Tiam Safari and I love a chunky knit!) Quick to make, easy to wear, super stylish and on trend. It’s no surprise that my first two patterns that I designed and launched under KNIT SAFARI are my most popular downloadable knitting patterns - my number one chunky knit cardigan pattern, The Seed Bomber and The Seed Bubble Sweater, which is my best-selling chunky knit sweater pattern.
With this in mind, I knew that I wanted to design a chunky knit cardigan for this collaboration. It’s in my wheelhouse, but it’s also a slightly different style for Rowan fans, so I was hoping it could attract some new people to the brand. I also knew I wanted something full of drama, and a chunky knit texture paired with giant, billowing sleeves.
My first design for the Mode at Rowan Blogger’s Edit is the Cocoon Cardi, an oversized knit cardigan worked in one giant panel of seed stitch, then folded and seamed. During the work-in-progress phase, it’s almost like making a blanket!
Fluffy Knits Are Important Too
THE HERRINGBONE
My second design for the Blogger’s Edit is something completely different - The “Herringbone” features a herringbone knit stitch that gives a woven effect, with oodles of texture. I’m looking forward to layering this over a crisp white shirt in winter, paired with some pale blue Mom jeans and a chunky hat. I wanted a sweater with a super-duper deep V neckline, slim sleeves, and a dropped back hem.
This sweater is knitted in Rowan Kid Classic, which creates such a soft, fluffy knit, and is so beautiful to knit with. It was definitely a case of the yarn inspiring the design - I tried a few different stitches, and I just fell in love with the stitch definition that this yarn provided. I’d love to do a super cosy beanie and mitten set in this yarn (maybe an idea for this Winter!?)
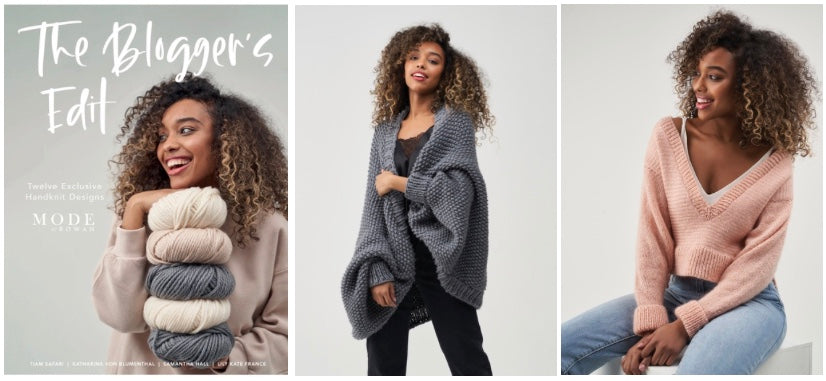
Want to see more? Click here to check out more of the Mode at Rowan Blogger’s Edit?
How to Knit: The Herringbone Stitch
I’ve also used this stitch in The Herringbone Knit Clutch, which is a chunky knit handbag in t-shirt yarn, so I thought this would be the perfect time to brush up your skills on this complex looking but simple to knit stitch. The concept is the same, whether you use a fine wool yarn or a chunky jersey yarn, and I recommend yarns with a strong stitch definition for this stitch (so, definitely steer away from beautifully hazy mohair.)
The Herringbone Stitch is worked on both the right side and wrong side of your knitting, and the simplest way to describe it is you work the second stitch first, then the first stitch second. Does that sound strange? It feels a bit awkward to begin with, but I promise that it gets easier and much less awkward after a few rows! Grab your needles and let’s get knitting!
You will need: one colour of yarn and some knitting needles. In this tutorial, I’m using Hoooked Zpagetti in Peach Shades and 15mm knitting needles.
Start by casting on multiples of 2 + 1 stitch..
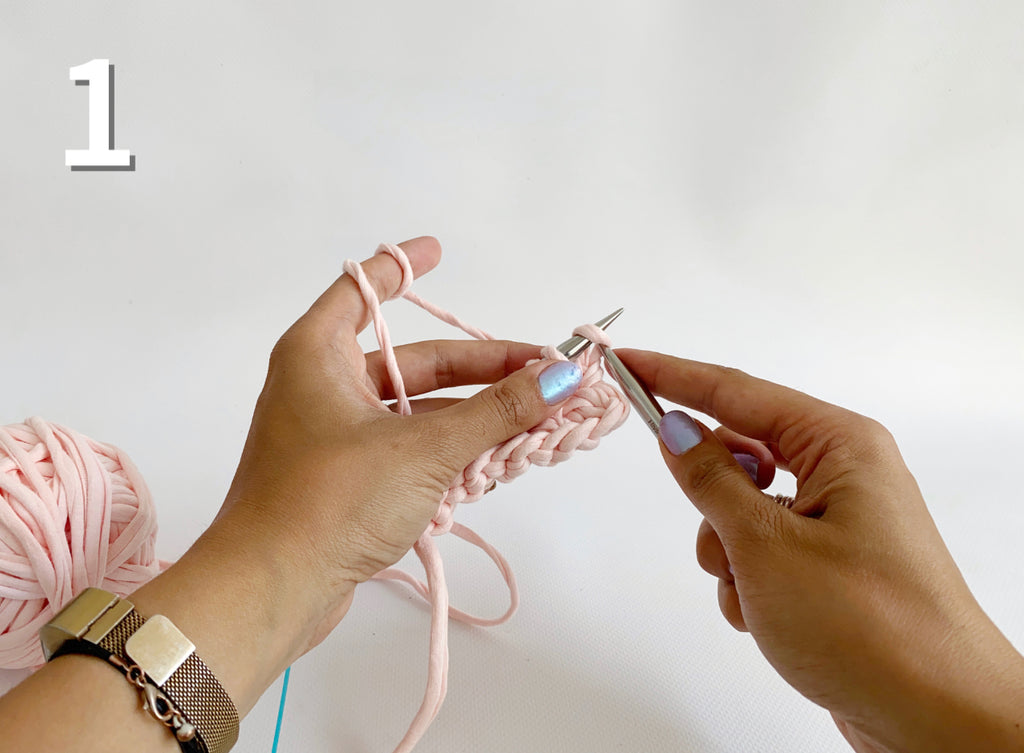
Step 1: (right side) slip the first stitch. You only do this for the very first stitch of each row, so that you get a neat and tidy edge to your knitting.
Step 2: Working between the stitches, knit the second stitch without slipping the first stitch off the needle.

Step 3: Knit the first stitch, without slipping it off the needle.
Step 4: You now have 2 old stitches on the left needle and 2 new stitches on the right needle.
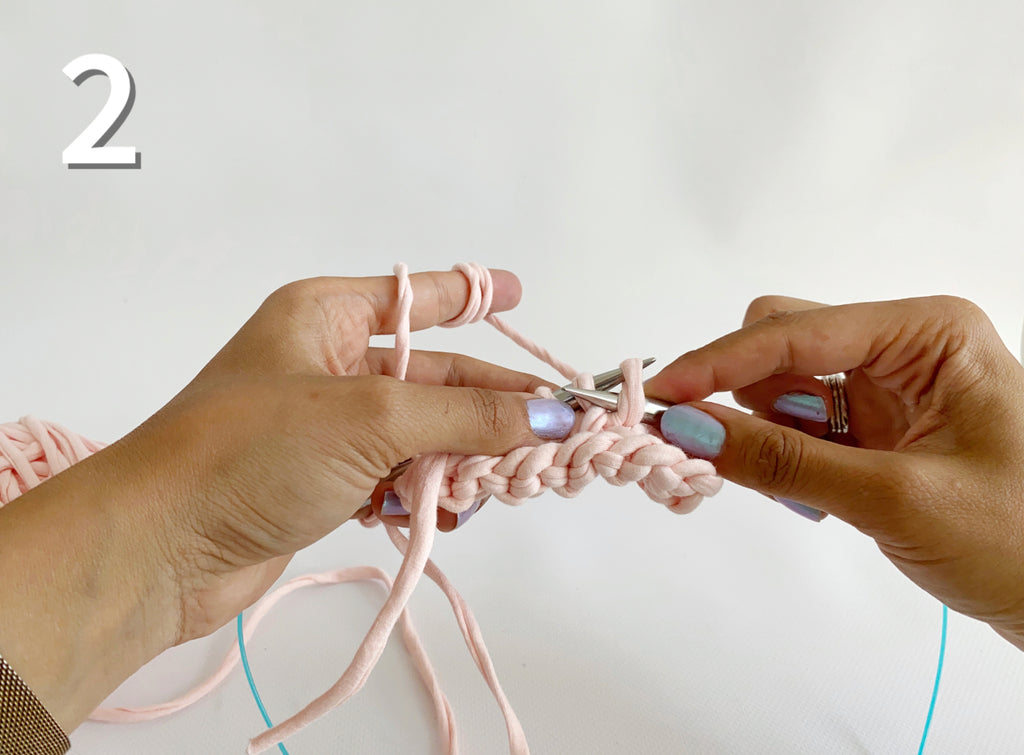
Step 5: Slip both old stitches off the left needle. You should see a little criss-cross effect in the stitches directly below the right needle. It’s a bit tricky on the first row, but it does get easier and more visible!
Continue working across the row, by repeating steps 3 to 5. You’ve now completed your first row! Phew.
Now it’s time to do the wrong side (or purl) row. It’s essentially the same as the right side (or knit) row, but you’ll be purling the stitches. Turn your work and let me walk you through it:
Step 6: (wrong side) slip the first stitch.
Step 7: Working between the stitches, purl the second stitch without slipping the first stitch off the needle.
Step 8: Purl the first stitch, without slipping the stitches off the needle.
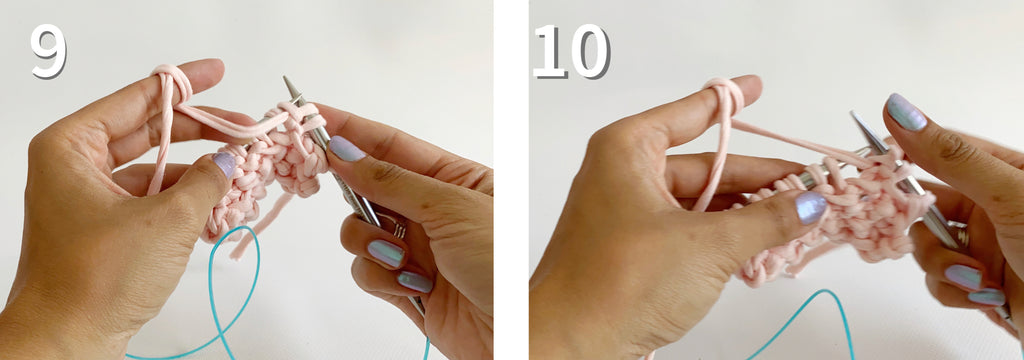
Step 9: You now have 2 old stitches on the left needle and 2 new stitches on the right needle.
Step 10: Slip both old stitches off the left needle. If you sneak a peek to the front of your work, you should see another row of cross-crosses under the right needle.
Repeat steps 7-10 to continue across the row.
Once you get to the end, you’ve repeated the second row and the first repeat of the pattern. Now your first two rows of Herringbone Stitch are now complete! Continue working like this until your work reaches the desired length. It’s quite tough on your fingers, so don’t make your tension too tight, otherwise it will be really difficult to work the pattern. If you find your knitting is really dense, try using a larger knitting needle than the yarn suggests, to keep the fabric nice and supple.
So, what do you think? Will you be trying out any of the Mode at Rowan designs, or incorporating the Herringbone Stitch into any of your future knitting patterns? Let me know in the comments!

