

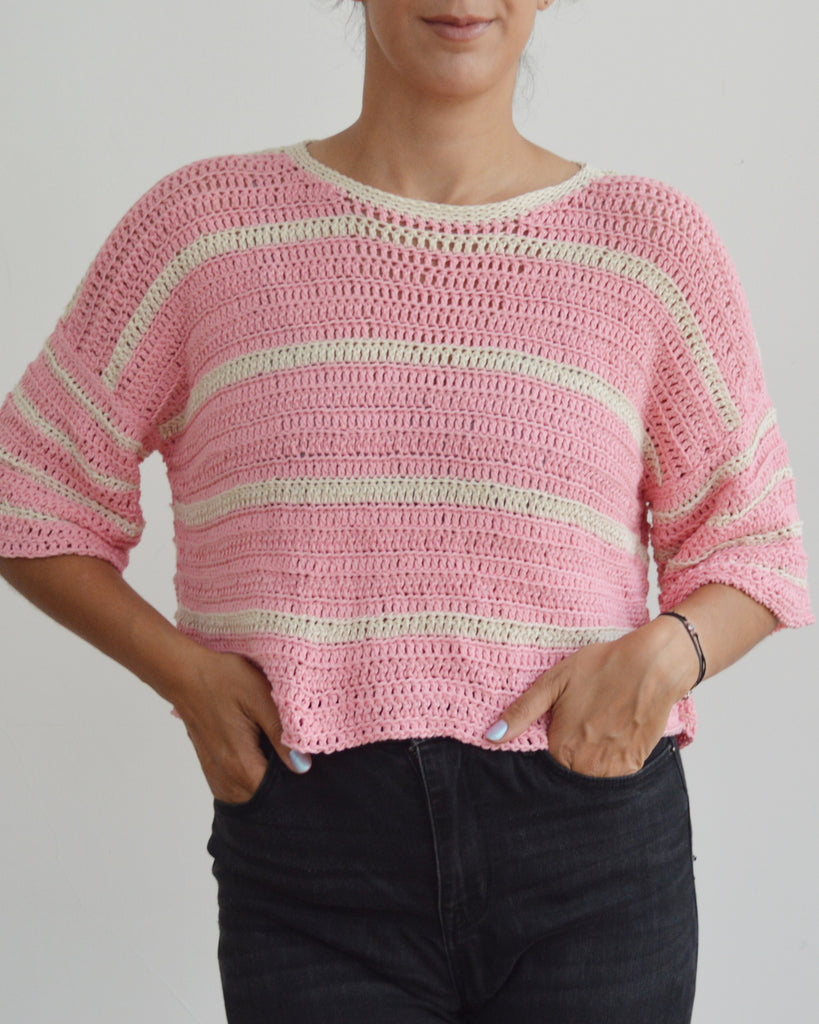
You may have seen my free pattern for the knitted Eezy-Breezy Striped Tee (if not, it’s available right here on the blog!) and already know why I love a cotton tee in summer. Easy to make, easy to wear, and laundry is a breeze. Pairing this crochet version with some high-waisted jeans when it’s a fraction above room temperature in London gives you more wear out of your warm-weather clothes too, which is good in my book!
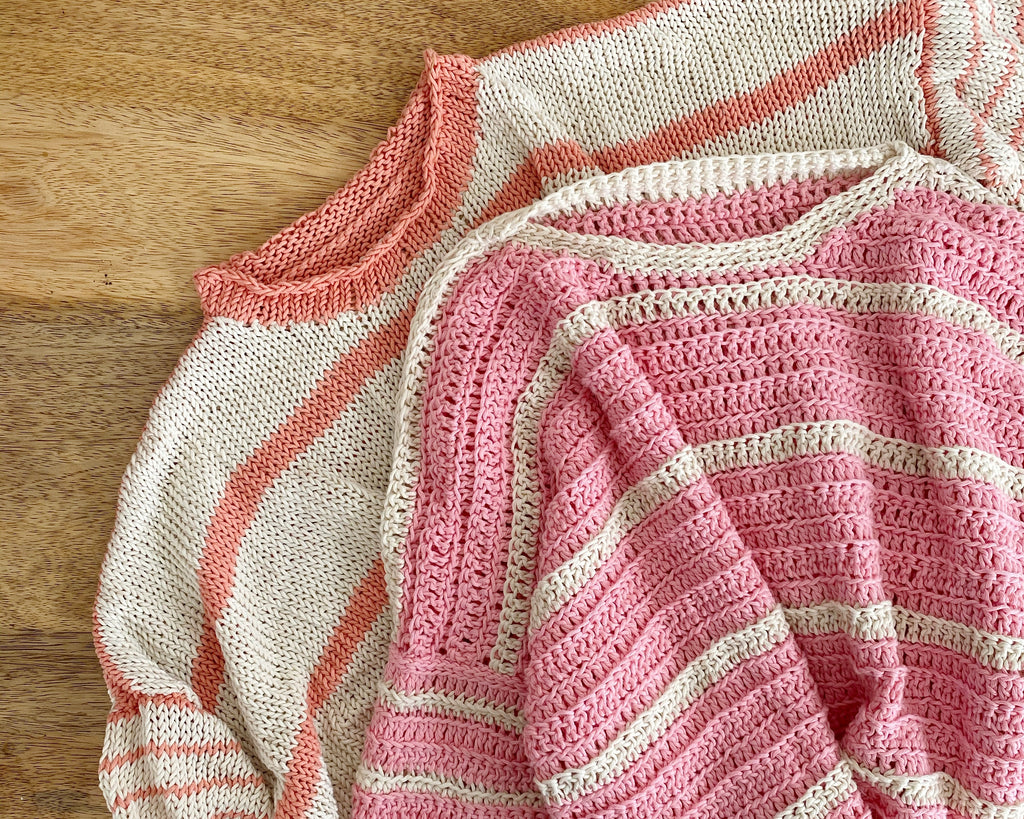
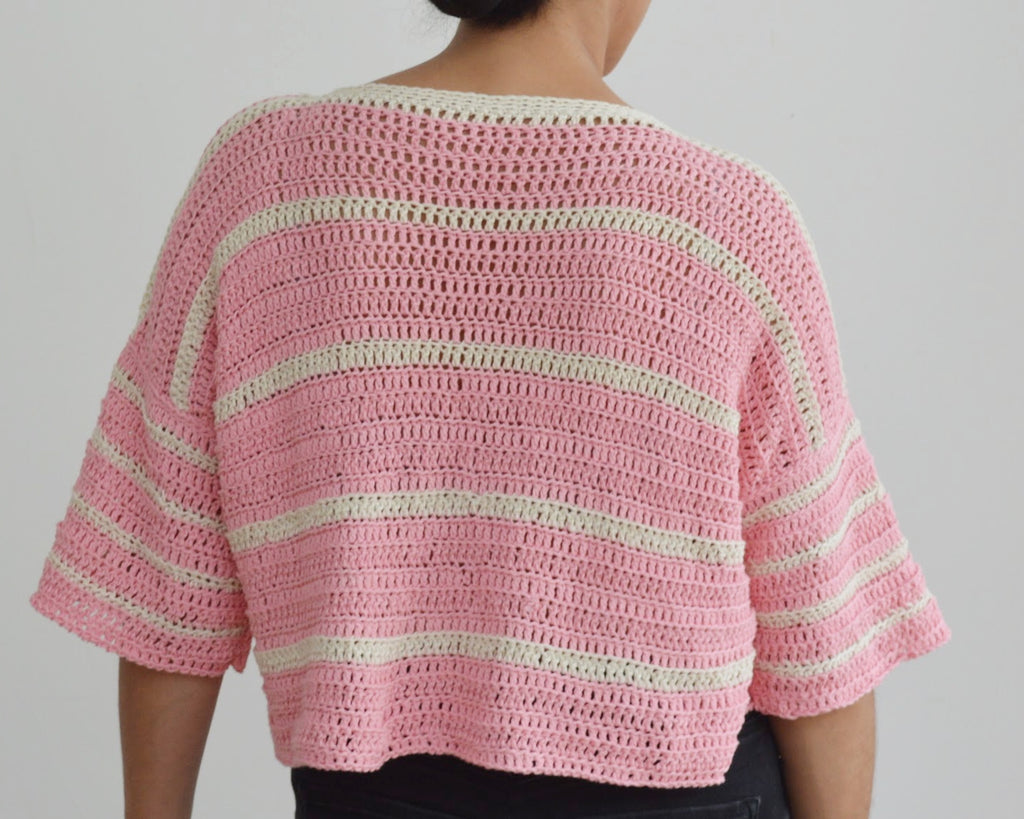
This striped tee is crocheted in flat panels, seamed, and then the neckline is worked in the round at the end for a professional finish. If you prefer to make things as seamlessly as possible, you can make the body seamless to the underarms, then follow the instructions to continue to make the top half of the back and front. You can also make the sleeves seamlessly, and sew them in at the shoulders (or, crochet directly from the shoulder seam to create the sleeve - it’s up to you!) As this is a basic pattern, I’ve only included instructions for the easy version.
This tee would look great in any DK cotton, such as Paintbox Yarns Cotton DK, or Knitcraft It’s Only Natural. If you’re not sure, pop your yarn into yarnsub.com and see if it’s a good match!
YOU WILL NEED
- Yarn: 6 (7, 8, 9, 10, 12, 13, 15, 17) 50g balls of cotton DK yarn. For the size M, I used 6 balls of Knitcraft It’s Only Natural in pink, and 2 balls in cream. If you would like to recreate the tee with the same thickness of stripes, you will need approx 5 (6, 6, 7, 8, 9, 10, 12, 13) balls of pink and 2 (2, 2, 3, 3, 3, 4, 4, 5) balls of cream. Yes, this is slightly more, but that’s because you’ll have some yarn leftover. (Please note, yarn quantities and estimates and depend on the yarn you select, your exact tension, and multiple other factors.)
- 5.5mm crochet hook
- 3 st markers
- sewing needle
GAUGE
16sts x 7rows = 10cm x 10cm in Treble Crochet (UK terminology)
SIZES & FINISHED MEASUREMENTS
This pattern includes instructions for multiple sizes. When the stitch instructions differ between each size, the instructions are given for the smallest size first, then medium, then large, and then the largest size, and is indicated by stitch counts in brackets, eg: XS (S, M, L, XL, 2XL, 3XL, 4XL, 5XL)
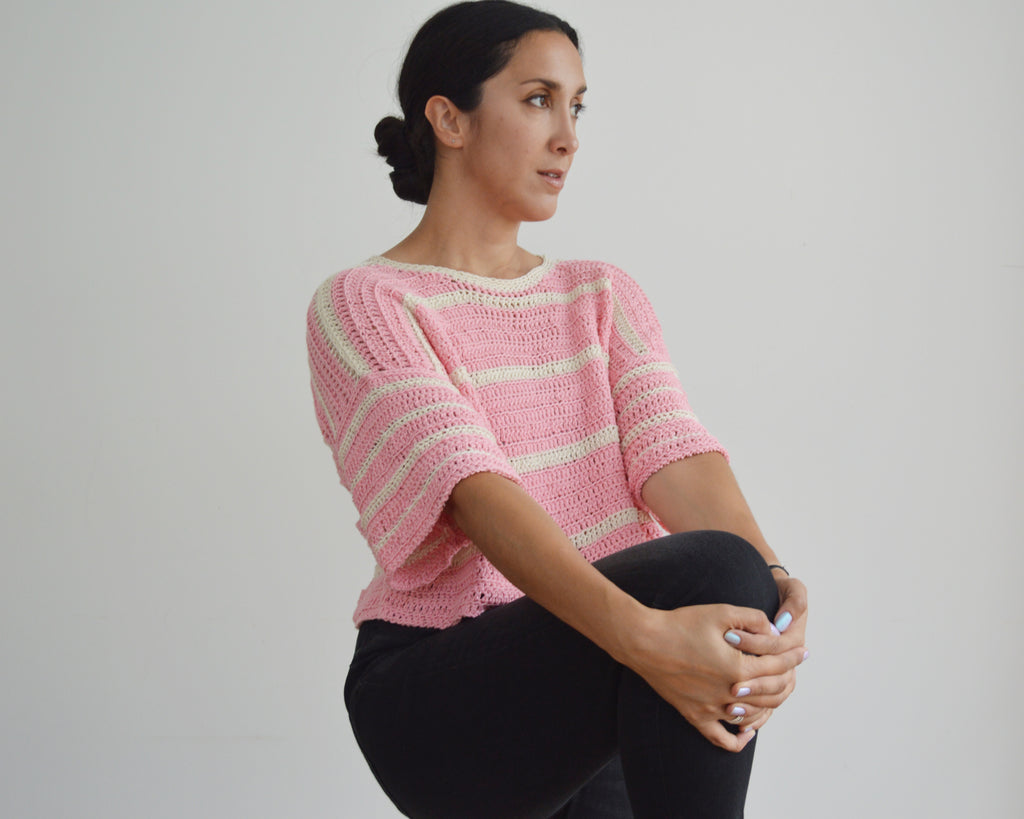
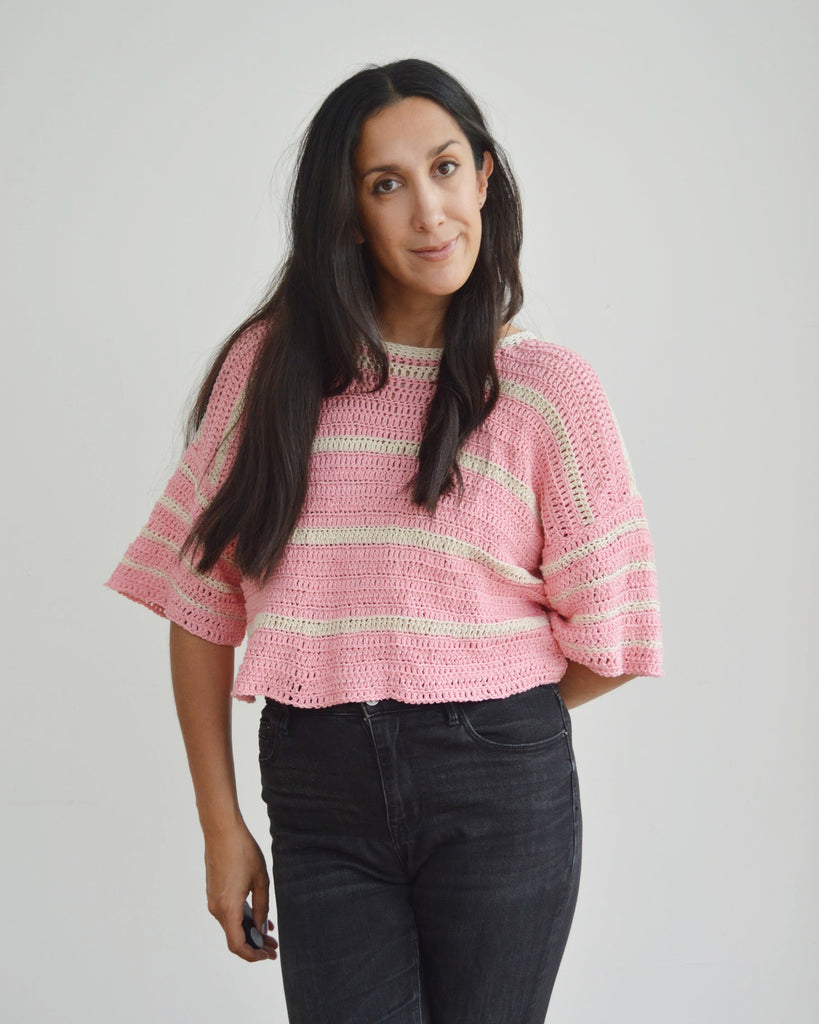
The Crochet Eezy-Breezy Striped Tee is an oversized fit. You may wish to knit a smaller size for an oversized fit.
The adult model (haha, that would be me...) is a UK size 10-12 and is wearing the Crochet Eezy-Breezy Striped Tee in size medium.

ABBREVIATIONS
TC Treble Crochet (NB: UK terminology is used throughout this pattern. This corresponds to DC Double Crochet in US terms)
DC Double Crochet (this corresponds to SC Single Crochet in US terms)
BLO back loop only
FLO front loop only
Ch chain
Sl st slip stitch
St/s stitch/stitches
Rep repeat
*...; repeat from the *
Decr decrease - I do this by the double crochet 2 together technique
WS wrong side
RS right side
NOTES
I wanted to keep this crochet version of the Eezy-Breezy Striped Tee in line with the knit version, so the striping is similar. If I was to make it again, I’d think about making it in a different colour combo, like:
- all in one colour (maybe black...), with contrast edges around the hem, sleeve edge, neckline, and maybe even using the contrast colour to seam it up on the right side
- in pastel rainbow stripes on a plain background
- in an ombré effect, using various shades of the same colour to go from light around the neckline to dark at the hem.
Whatever you decide on your crochet summer top, be sure to take lots of photos and tag me on instagram! I’d love to see!
If you prefer a longer body on your tee, crochet more rows for the body. If you prefer a longer sleeve, just crochet more rows here too. Keep in mind that this will impact your yarn usage, and will also weigh down your tee so it might stretch and grow over time.
Finally, before you get started, please note that I used a turning chain of 1 ch, and worked the first TC into the first st. This is because I personally preferred the way this looked in this yarn and with this size hook. The ch 1 does not count as a stitch. If you prefer a different technique, such as ch 3 or a standing treble crochet, please feel free to use that instead!
THE PATTERN
BACK
STEP 1 With 5.5mm crochet hook and pink yarn, ch 80 (84, 92, 100, 108, 116, 124, 132, 140). Starting in 3rd ch from hook, TC 78 (82, 90, 98, 106, 114, 122, 130, 138)
Please note, the turning chain does not count as st.
You will now only work into the FLO or BLO of the st, in alternating rows to create the straight line texture. On RS rows, always work into the BLO. On WS rows, always work into the FLO. As the row counts vary for the 9 sizes, you will need to keep track of whether you are working into the FLO or BLO.
STEP 2 Ch 1, turn. TC (into the BLO on RS rows and FLO on WS rows) 78 (82, 90, 98, 106, 114, 122, 130, 138).
Rep step 2 for 28 (29, 29, 32, 34, 37, 40, 42, 44) rows in total (or until your panel reaches the length you like), working in alternating stripes of Pink for 5 rows and Cream for 1 row. Don’t cut the yarn at the end of each colour change, just carry it up every other rows (this is so you don’t have loads of ends to weave in at the end, because as you probably know, I think that is not very fun! Remember not to yank too tightly as this will pucker the rows, but also don’t leave a big loop of yarn because you’ll get snagged in it when you take it off!)
Note: if you did make the panel longer or shorter, write down how many extra or fewer rows you worked, just so you don’t forget. After years and years of knitting and crocheting, I can promise you I always *think* I’ll remember, but I never do!
Secure final st, cut yarn.
FRONT
Rep steps 1-2 as for the back (including making sure to work the correct FLO or BLO row AND the correct colour to match the back!), working step 2 for 25 (25, 25, 28, 30, 32, 35, 36, 38) rows in total.
Note, if you made your back panel longer or shorter, please work more (or fewer) rows now, before beginning the neckline shaping. You will now work across only half of the sts, to shape the right half of the neckline.
STEP 3 Ch 1, turn. TC (into the BLO on RS rows and FLO on WS rows) 33 (35, 38, 41, 45, 48, 52, 55, 58) sts. (34, 36, 39, 42, 46, 49, 53, 56, 59 sts)
STEP 4 Ch 1, turn. Work 3 sl st, 1 DC, TC 30 (32, 35, 38, 41, 44, 47, 51, 54) sts. (31, 33, 36, 39, 42, 45, 48, 52, 55 sts)
STEP 5 Ch 1, turn. Work TC 27 (29, 32, 35, 38, 41, 43, 46, 49), then 1 DC into next st. (28, 30, 33, 36, 39, 42, 44, 47, 50 sts)
STEP 6 Ch 1, turn. Work 1 DC, DC dec in next 2 sts, TC 25 (27, 30, 33, 35, 38, 41, 43, 46) sts. (27, 29, 32, 35, 37, 40, 43, 45, 48 sts)
For size XS only:
Secure final st, cut yarn.
For sizes S-5XL only:
STEP 7 Ch 1, turn. Work TC (26, 29, 32, 34, 37, 39, 42, 44) sts, DC dec in next 2 sts, 1 DC in final st. (28, 31, 34, 36, 39, 41, 44, 46 sts)
For sizes S-XL only:
Secure final st, cut yarn.
For sizes 2XL-5XL only:
STEP 8 Ch 1, turn. Work 1 DC, DC dec in next 2 sts, TC 36 (38, 41, 43) sts. (38, 40, 43, 45 sts)
Secure final st, cut yarn.
For sizes 4XL-5XL only:
STEP 9 Ch 1, turn. Work TC 40 (42) sts, DC dec in next 2 sts, 1 DC in final st. (42, 44 sts)
Secure final st, cut yarn.
SLEEVES
Follow instructions twice to make two sleeves.
STEP 1 With 5.5mm crochet hook and pink yarn, ch 61 (63, 66, 70, 73, 77, 80, 84, 87). Starting in 3rd ch from hook, TC 59 (61, 64, 68, 71, 75, 78, 82, 85) sts.
Please note, the turning chain does not count as a st.
You will now only work into the FLO or BLO of the st, in alternating rows to create the straight line texture. On RS rows, always work into the BLO. On WS rows, always work into the FLO. As the row counts vary for the 9 sizes, you will need to keep track of whether you are working into the FLO or BLO.
Also, to make the cream stripes on the sleeves visually smaller, I decided to use DC instead of TC for these rows. Play around with different stitches - you might like an even skinnier stripe, so you could do a row of sl st. You might prefer the cream stripes to match the body, so do a row of TC. At each colour change, you will need to cut and secure the yarn, or carry it across the row if you prefer. I think this makes the fabric a bit thick and bulky, so don’t tend to do this very often (even though I hate weaving in ends!)
STEP 2 Ch 1, turn. With pink, TC 59 (61, 64, 68, 71, 75, 78, 82, 85) sts.
STEP 3 Join cream, ch 1, turn. DC 59 (61, 64, 68, 71, 75, 78, 82, 85) sts.
Rep step 2, twice. Then, rep step 3, once. This forms your striped block. Work these striped blocks 1 (2, 2, 3, 3, 4, 4, 4, 5) more times.
Rep step 2, a further 2 (0, 1, 0, 2, 0, 2, 2, 0) times. Secure final st, cut yarn.
FINISHING AND NECKLINE
STEP 1 Sew front and back together at the shoulder. Find the centre point of the sleeve and match to the shoulder seam, then sew in sleeves. Place a st marker to match the front and back together at the following three points: bottom of the hem, underarm, edge of sleeve. Sew front and back together along side seam from sleeve edge to underarm to hem. Secure st.
STEP 2 Using 5.5mm crochet hook and pink, DC evenly around neckline, working 33 (34, 37, 41, 44, 47, 51, 54, 57) sts along front and 25 (26, 30, 31, 33, 36, 38, 41, 43) sts across the back neckline. Working in continuous rnds, DC BLO for 3 rnds. Secure final st, cut yarn.
STEP 3 Weave in all ends. Wear your Eezy-Breezy Crochet Striped Tee, and take a photo and tag me in it on Instagram so I can see too! Then, decide what you’re going to crochet next.
 Note: I was kindly gifted the yarn for this project Hobbycraft, however was not required to post about the product and did not receive payment for any content created. Additionally, some of the links in this blog post are affiliate links, and I may make a small commission if you click through and decide to purchase the items. This does not affect the price you pay, and these are items that I have personally tried and loved using, and the small commission allows me to continue creating patterns for you!